Why is Important to Add a Second Domain Controller?
- High Availability:
If your primary DC goes down, the secondary DC can continue to handle authentication and other AD services, minimizing downtime. - Load Balancing:
A second DC can share the workload, improving performance for user logins, Group Policy processing, and other AD-related tasks. - Fault Tolerance:
If one DC fails, the other ensures that your domain remains operational. - Geographic Redundancy:
If you have multiple locations, you can place DCs in different sites to improve performance and reliability for users in those locations. - Disaster Recovery:
A second DC acts as a backup for AD data, making it easier to recover from catastrophic failures.
Step-by-Step Guide to Add a Second Domain Controller
Step 1: Prepare the Second Server
- Install Windows Server 2022:
Set up a new server with Windows Server 2022 or the version of your choice. Ensure it has a static IP address and is connected to the same network as your primary DC. - Join the Server to the Domain:
- Log in to the new server.
- Go to System Properties > Computer Name > Change.
- Select Domain and enter your domain name (e.g.,
myblog.local). - Provide credentials for a domain admin account when prompted.
- Restart the server to complete the process.
Step 2: Install the AD DS Role on the Second Server
- Open Server Manager on the new server.
- Click Manage > Add Roles and Features.
- In the Add Roles and Features Wizard, click Next until you reach the Server Roles page.
- Check the box for Active Directory Domain Services.
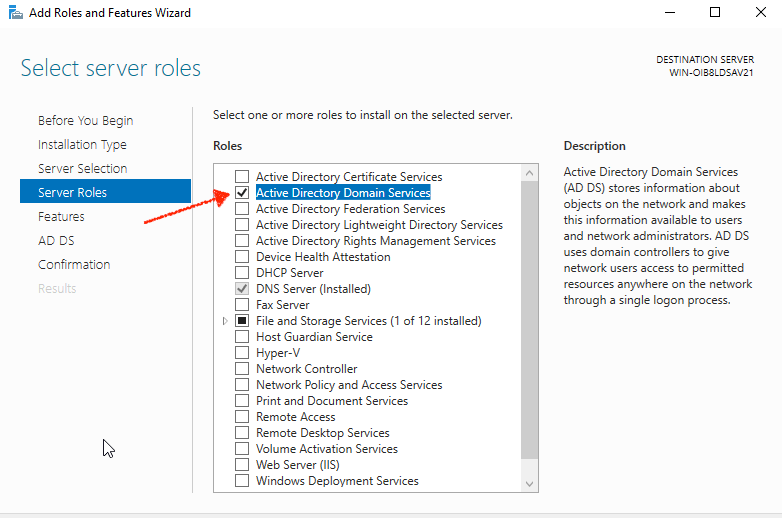
- A pop-up will appear asking to add required features. Click Add Features.
- Click Next until you reach the Confirmation page.
- Check Restart the destination server automatically if required (if prompted).
- Click Install.
- Wait for the installation to complete, then click Close.
Step 3: Promote the Second Server to a Domain Controller
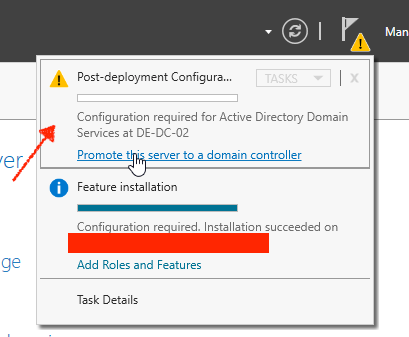
- In Server Manager, click the Notifications flag in the top-right corner.
- Click Promote this server to a domain controller.
- In the Active Directory Domain Services Configuration Wizard, select Add a domain controller to an existing domain.
- Enter your domain name (e.g.,
myblog.local) and click Next.
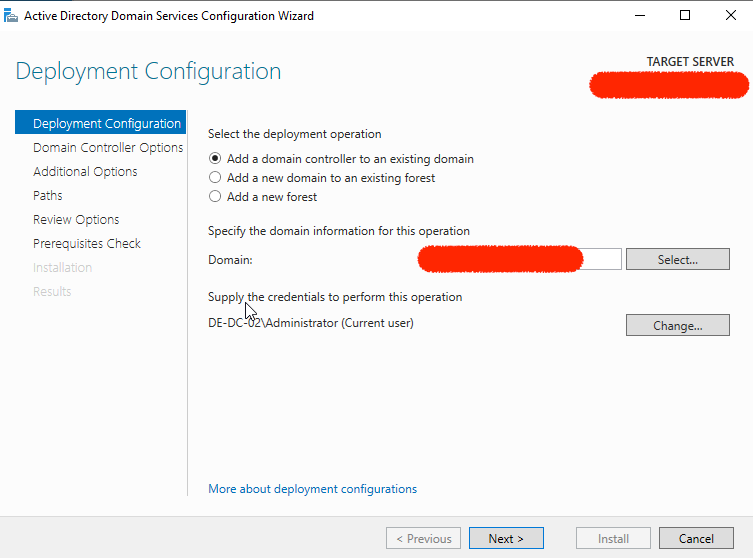
- Provide credentials for a domain admin account when prompted.
- Select the Domain Controller Options:
- Ensure Domain Name System (DNS) server and Global Catalog (GC) are checked.
- Leave Read-Only Domain Controller (RODC) unchecked (unless you specifically need an RODC).
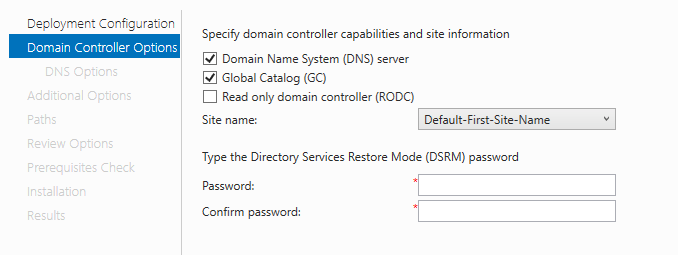
- Click Next.
- On the DNS Options page, click Next (your DNS is already set up).
- Accept the default NetBIOS domain name and click Next.
- Specify the paths for the AD database, log files, and SYSVOL folder (defaults are usually fine) and click Next.
- Review the Prerequisites Check page. If everything is okay, click Install.
- The server will restart automatically to complete the promotion process.
Step 4: Verify the Second Domain Controller
- After the server restarts, log in with your domain administrator account (e.g.,
Domain\Administrator). - Open Server Manager and confirm that AD DS is listed under Roles.
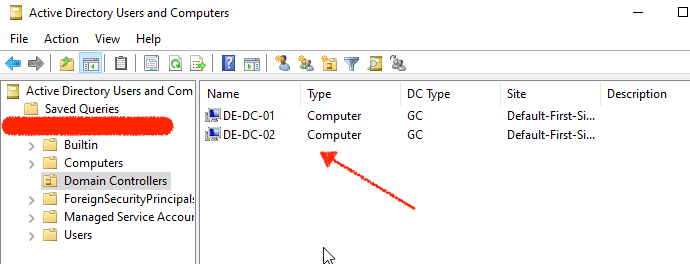
- Open Active Directory Users and Computers (from the Tools menu in Server Manager) to verify that the second DC is listed under the Domain Controllers OU.
- Open DNS Manager and verify that the second DC’s records have been added to the DNS zones.
What Else Can You Do with Active Directory?
Now that you have a second DC, here are some additional tasks to enhance your AD environment:
1. Configure Sites and Subnets
- If you have multiple physical locations, create sites in AD to optimize replication and authentication traffic.
- Go to Active Directory Sites and Services and define your sites and subnets.
2. Set Up Group Policy
- Use Group Policy Management Console (GPMC) to create and manage Group Policy Objects (GPOs).
- Apply GPOs to enforce security settings, deploy software, and configure user/computer settings.
3. Implement Organizational Units (OUs)
- Organize users, computers, and groups into OUs for better management and delegation of administrative tasks.
4. Enable Replication Monitoring
- Use Active Directory Replication Status Tool or Repadmin to monitor replication between your DCs.
5. Set Up Backup and Recovery
- Use Windows Server Backup or a third-party tool to back up your AD environment regularly.
- Test your recovery process to ensure you can restore AD in case of failure.
6. Implement Security Best Practices
- Enable Account Lockout Policies and Password Policies via Group Policy.
- Regularly review and clean up inactive user and computer accounts.
See you around 🙂