
Setting up DHCP (Dynamic Host Configuration Protocol) is a crucial step in automating IP address management for your network. With DHCP, you can ensure that all devices on your network receive the correct IP configuration (IP address, subnet mask, default gateway, DNS servers, etc.) without manual intervention. Let’s dive into the step-by-step process of setting up DHCP on your Windows Server 2022.
Step 0: Prerequisites
- Set a Static IP Address:
- Open Server Manager.Click Local Server in the left-hand pane.Under Properties, find the network connection and click the link next to it (e.g., “Ethernet”).In the Network Connections window, right-click your network adapter and select Properties.Select Internet Protocol Version 4 (TCP/IPv4) and click Properties.Choose Use the following IP address and enter:
- IP Address: A static IP (e.g.,
192.168.1.12).Subnet Mask: Typically255.255.255.0.Default Gateway: Your router’s IP (e.g.,192.168.1.1).Preferred DNS Server: Set this to your primary DC’s IP (e.g.,192.168.1.10).
- IP Address: A static IP (e.g.,
- Open Server Manager.Click Local Server in the left-hand pane.Under Properties, find the network connection and click the link next to it (e.g., “Ethernet”).In the Network Connections window, right-click your network adapter and select Properties.Select Internet Protocol Version 4 (TCP/IPv4) and click Properties.Choose Use the following IP address and enter:
- Join the Server to the Domain:
- Go to System Properties > Computer Name > Change.
- Select Domain and enter your domain name (e.g.,
myblog.local). - Provide credentials for a domain admin account when prompted.
- Restart the server to complete the process.
Step 1: Install the DHCP Server Role
- Open Server Manager.
- Click Manage > Add Roles and Features.
- In the Add Roles and Features Wizard, click Next until you reach the Server Roles page.
- Check the box for DHCP Server.
- A pop-up will appear asking to add required features. Click Add Features.
- Click Next until you reach the Confirmation page.
- Check Restart the destination server automatically if required (if prompted).
- Click Install.
- Wait for the installation to complete, then click Close.
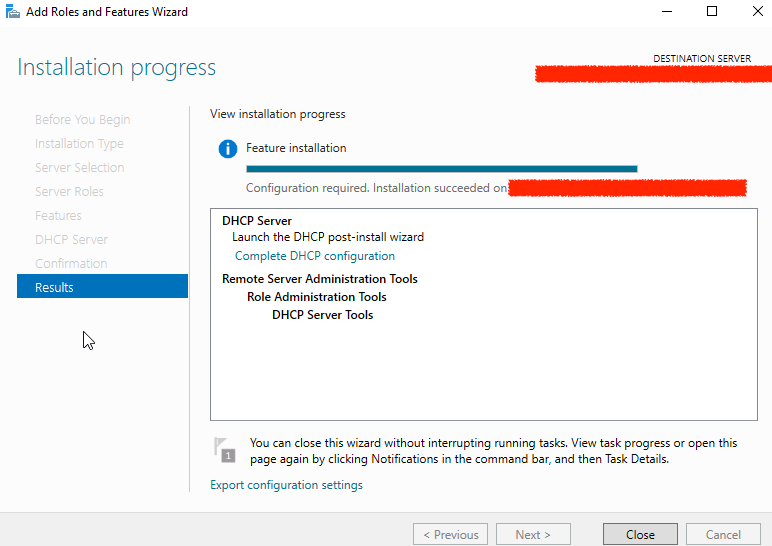
Step 2: Configure the DHCP Server
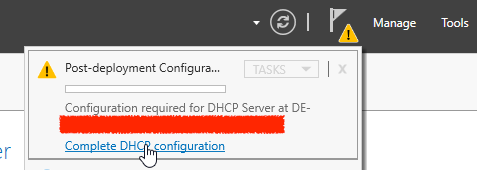
- After installation, go back to Server Manager.
- Click the Notifications flag in the top-right corner.
- Click Complete DHCP configuration.
- In the DHCP Post-Install Configuration Wizard, click Next.
- On the Authorization page, select Use the following user’s credentials and ensure it’s using a domain admin account. Click Commit.
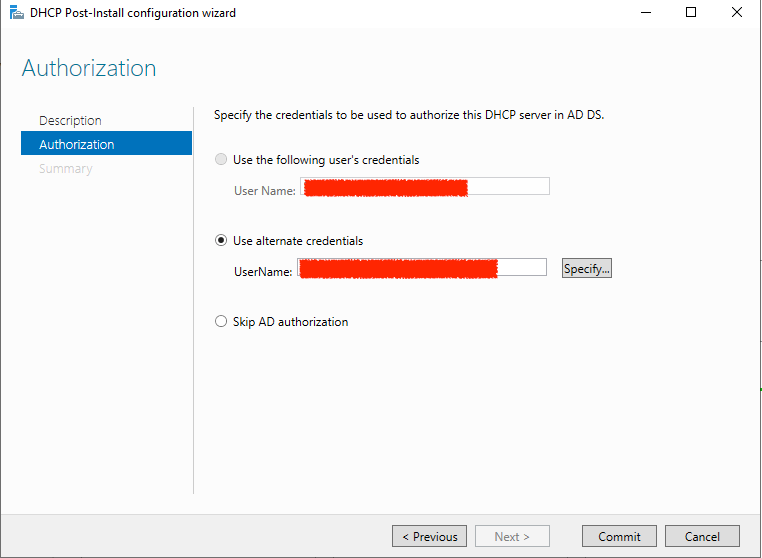
- Click Close to complete the configuration.
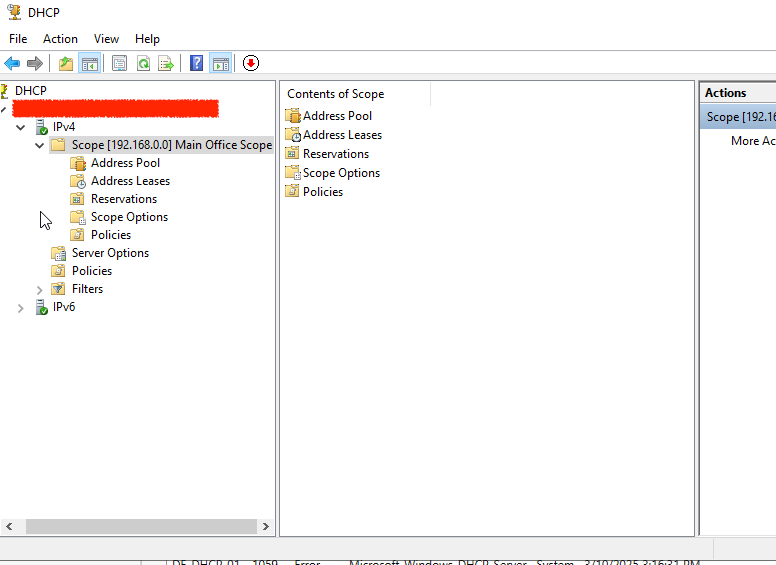
Step 3: Create a DHCP Scope
- Open DHCP Manager from Server Manager > Tools > DHCP.
- In the left-hand pane, expand your server name and right-click IPv4.
- Select New Scope.
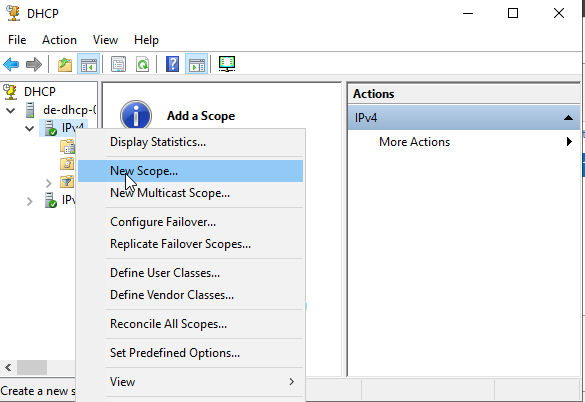
- In the New Scope Wizard, click Next.
- Enter a name and description for the scope (e.g.,
Main Office Scope) and click Next. - Define the IP Address Range:
- Start IP Address: e.g.,
192.168.1.100 - End IP Address: e.g.,
192.168.1.200 - Subnet Mask: e.g.,
255.255.255.0 - Click Next.
- Start IP Address: e.g.,
- Add any Exclusions (if needed) and click Next.
- Set the Lease Duration (default is 8 days) and click Next.
- On the Configure DHCP Options page, select Yes, I want to configure these options now and click Next.
- Configure the Router (Default Gateway):
- Enter the IP address of your default gateway (e.g.,
192.168.1.1). - Click Add, then Next.
- Enter the IP address of your default gateway (e.g.,
- Configure the Domain Name and DNS Servers:
- Enter your domain name (e.g.,
myblog.local). - Add the IP addresses of your DNS servers (e.g., your DCs’ IPs:
192.168.1.10and192.168.1.11). - Click Add, then Next.
- Enter your domain name (e.g.,
- Configure the WINS Servers (if applicable) and click Next.
- Select Yes, I want to activate this scope now and click Next.
- Click Finish to create the scope.
Step 5: Test the DHCP Server
- On a client machine, ensure it’s set to obtain an IP address automatically:
- Go to Network Settings > Change adapter options.
- Right-click the network adapter and select Properties.
- Double-click Internet Protocol Version 4 (TCP/IPv4).
- Ensure Obtain an IP address automatically and Obtain DNS server address automaticallyare selected.
- Release and renew the IP address:
- Open Command Prompt and run:Copyipconfig /release ipconfig /renew
- Verify that the client receives an IP address within the scope range (e.g.,
192.168.1.100to192.168.1.200).
Best Practices for DHCP
- Use Multiple Scopes for Different Subnets:
If you have multiple subnets, create separate scopes for each one. - Configure DHCP Failover:
Set up a second DHCP server for redundancy. Use DHCP Failover to synchronize scopes between two servers. - Reserve IP Addresses for Critical Devices:
Use DHCP Reservations to assign static IPs to devices like printers, servers, or network equipment. - Monitor DHCP Usage:
Regularly check the DHCP lease table to ensure there are enough available IP addresses. - Backup DHCP Configuration:
Use the Export-DhcpServer PowerShell cmdlet to back up your DHCP configuration.


Pingback: DHCP Failover - Add Secondary DHCP - Lazar's World