
What is Domain Name System (DNS)?
Think of the Domain Name System (DNS) as the internet’s phonebook. Just like you use a phonebook to look up someone’s phone number by their name, DNS helps your computer find the right website by translating human-friendly domain names (like www.google.com) into machine-friendly IP addresses (like 172.217.10.46).
When you type a website address into your browser, your computer doesn’t inherently know where to go. It asks a DNS server, “Hey, where can I find www.google.com?” The DNS server responds with the corresponding IP address, and your browser connects to that address to load the website.
In short, DNS makes the internet user-friendly by letting you use easy-to-remember names instead of complicated strings of numbers. Without DNS, we’d all be stuck memorising IP addresses—and nobody wants that!
Requirements
Before you begin, ensure you have the following:
- Windows Server 2022: Installed and configured with administrative privileges.
- Static IP Address: The server should have a static IP address configured.
- Administrator Access: You need administrative rights to install and configure roles.
- Domain Name: Decide on the domain name you want to use (e.g.,
myblog.local). - Network Connectivity: Ensure the server is connected to the network and can access the internet (if needed for external DNS resolution).
Step-by-Step Guide to Set Up a DNS Server
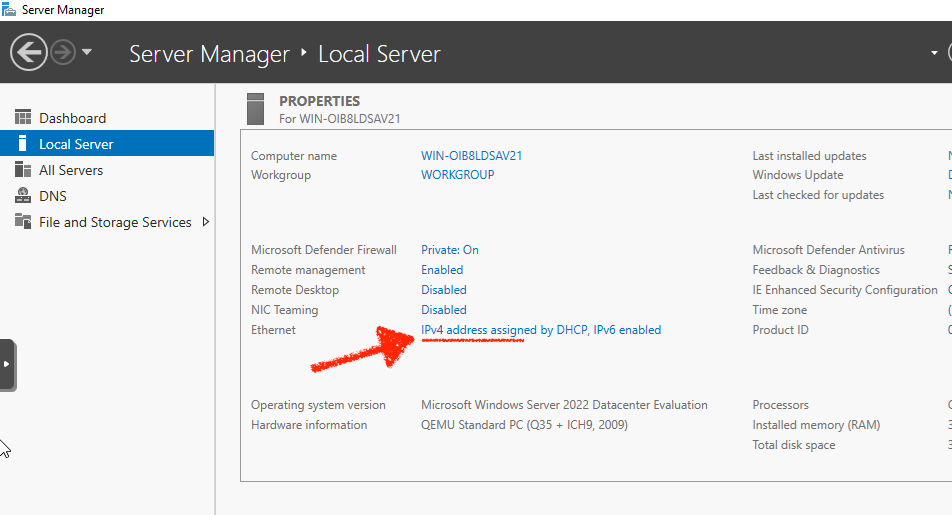
Step 1: Assign a Static IP Address
- Open Server Manager.
- Click Local Server in the left-hand pane.
- Under Properties, find the network connection and click the link next to it (e.g., “Ethernet”).
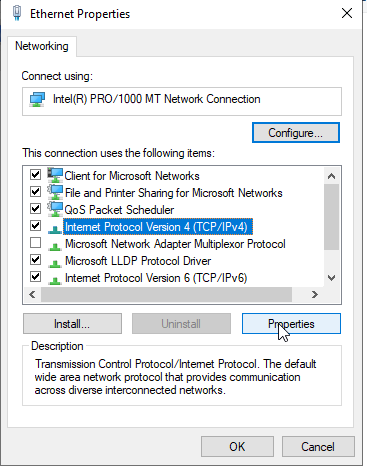
- In the Network Connections window, right-click your network adapter and select Properties.
- Select Internet Protocol Version 4 (TCP/IPv4) and click Properties.
- Choose Use the following IP address and enter:
- IP Address: A static IP (e.g.,
192.168.1.10). - Subnet Mask: Typically
255.255.255.0. - Default Gateway: Your router’s IP (e.g.,
192.168.1.1). - Preferred DNS Server: Set this to the same IP as your server (e.g.,
192.168.1.10).
- IP Address: A static IP (e.g.,
- Click OK to save the settings.
Step 2: Install the DNS Server Role
- Open Server Manager.
- Click Manage in the top-right corner and select Add Roles and Features.
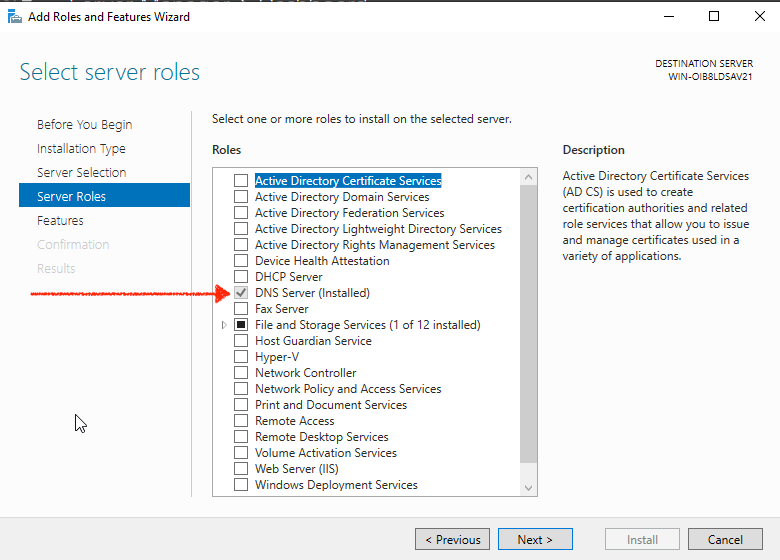
- In the Add Roles and Features Wizard, click Next until you reach the Server Roles page.
- Check the box for DNS Server.
- A pop-up will appear asking to add required features. Click Add Features.
- Click Next until you reach the Confirmation page.
- Check Restart the destination server automatically if required (if prompted).
- Click Install.
- Wait for the installation to complete, then click Close.
Step 3: Configure the DNS Server
- Open Server Manager.
- Click Tools in the top-right corner and select DNS.

- In the DNS Manager window, expand your server name in the left-hand pane.
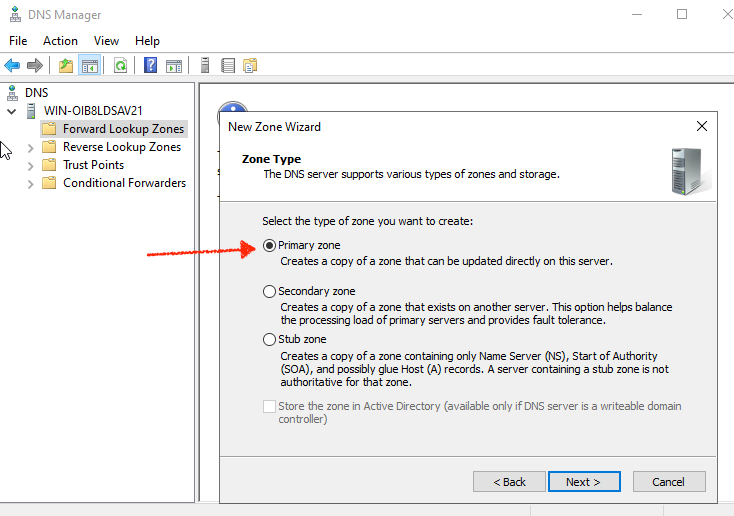
- Right-click Forward Lookup Zones and select New Zone.
- In the New Zone Wizard, click Next.
- Select Primary Zone and click Next.
- Choose To all DNS servers running on domain controllers in this domain (or the appropriate option for your setup) and click Next.
- Enter your domain name (e.g.,
myblog.local) and click Next. - Select Create a new file with this file name (default) and click Next.
- Choose Do not allow dynamic updates (or select the appropriate option for your needs) and click Next.
- Click Finish to create the zone.
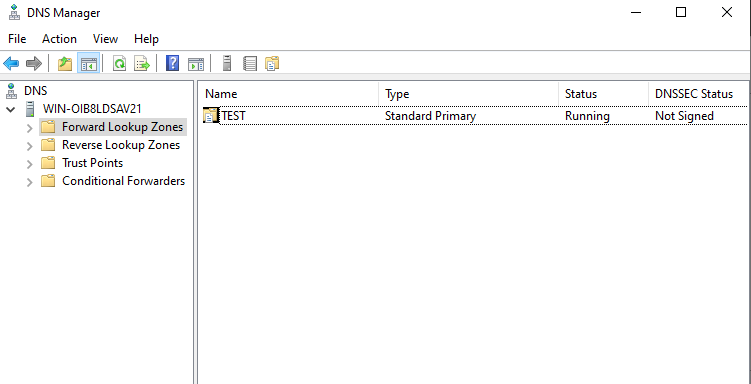
Step 4: Add DNS Records
- In DNS Manager, expand Forward Lookup Zones and click your domain (e.g.,
myblog.local). - Right-click the domain and select New Host (A or AAAA).
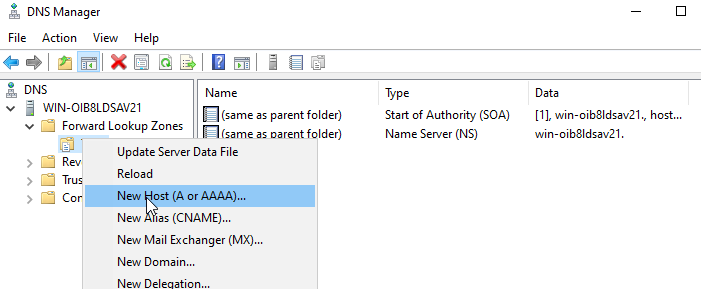
- Enter the following:
- Name: Leave blank for the root domain or enter a subdomain (e.g.,
www). - IP Address: Enter the IP address of the server or resource (e.g.,
192.168.1.10).
- Name: Leave blank for the root domain or enter a subdomain (e.g.,
- Click Add Host, then OK.
- Repeat this process to add other records (e.g., MX for mail servers, CNAME for aliases, etc.).
Step 5: Test the DNS Server
- Open Command Prompt on the server or another machine on the network.
- Use the
nslookupcommand to test DNS resolution:
nslookup example.comStep 6: Configure Client Machines
- On client machines, go to Network Settings.
- Set the Preferred DNS Server to the IP address of your DNS server (e.g.,
192.168.1.10). - Test DNS resolution using
nslookupor by accessing the domain in a browser.
Optional: Configure Forwarders for External DNS Resolution
If you want your DNS server to resolve external domain names (e.g., google.com), configure forwarders:
- Open DNS Manager.
- Right-click your server name and select Properties.
- Go to the Forwarders tab.
- Click Edit and add the IP addresses of public DNS servers (e.g.,
8.8.8.8for Google DNS). - Click OK to save.
Why Configure Forwarders?
When your DNS server is set up, it can resolve domain names for the zones you’ve created (e.g., myblog.local). However, it won’t inherently know how to resolve external domain names (e.g., google.com, microsoft.com) because those domains are managed by external DNS servers on the internet.
By configuring forwarders, you’re telling your DNS server:
“If you don’t know how to resolve a domain name, ask these specific external DNS servers for help.”
How It Works
- Local DNS Resolution:
- Your DNS server first checks its local zones (e.g.,
myblog.local) to see if it can resolve the requested domain name. - If the domain is part of your local setup, it responds with the corresponding IP address.
- Your DNS server first checks its local zones (e.g.,
- External DNS Resolution:
- If the domain is not part of your local setup (e.g.,
google.com), your DNS server needs to query external DNS servers to find the IP address. - Without forwarders, your DNS server would use root hints to query the global DNS hierarchy, starting from the root DNS servers. This process can be slower and less efficient.
- If the domain is not part of your local setup (e.g.,
- Using Forwarders:
- When you configure forwarders, your DNS server skips the root hints process and directly queries the specified external DNS servers (e.g., Google DNS at
8.8.8.8or Cloudflare DNS at1.1.1.1). - These external DNS servers are typically faster and more reliable for resolving external domain names.
- When you configure forwarders, your DNS server skips the root hints process and directly queries the specified external DNS servers (e.g., Google DNS at
Why Is This Important?
- Improved Performance:
- Forwarders can speed up DNS resolution for external domains because they bypass the longer process of querying root hints.
- Public DNS servers like Google DNS or Cloudflare DNS are optimized for fast responses.
- Reduced Network Traffic:
- By using forwarders, your DNS server reduces the number of queries it needs to send to the global DNS hierarchy, which can save bandwidth and improve efficiency.
- Better Reliability:
- Public DNS servers are highly reliable and have large, distributed networks. By forwarding queries to them, you ensure consistent and accurate resolution of external domains.
- Customization:
- You can choose which DNS servers to use as forwarders based on your preferences (e.g., privacy-focused DNS servers like Cloudflare or OpenDNS).
When Should You Configure Forwarders?
- If your DNS server needs to resolve external domains:
For example, if users on your network need to access websites likegoogle.comormicrosoft.com, forwarders are essential. - If you want faster external DNS resolution:
Forwarders can significantly reduce the time it takes to resolve external domain names. - If you want to use specific DNS providers:
Some organizations prefer to use DNS servers that offer additional features like malware blocking (e.g., OpenDNS) or enhanced privacy (e.g., Cloudflare).
What Happens If You Don’t Configure Forwarders?
If you don’t configure forwarders, your DNS server will still be able to resolve external domain names, but it will do so by querying the root hints servers. This process involves:
- Querying the root DNS servers.
- Querying the top-level domain (TLD) servers (e.g.,
.com,.org). - Querying the authoritative DNS servers for the specific domain.
While this works, it’s generally slower and less efficient than using forwarders.
Configuring forwarders is like giving your DNS server a shortcut to resolve external domain names. It improves performance, reduces network traffic, and ensures reliable access to external resources. While it’s optional, it’s highly recommended for most setups, especially if your DNS server needs to handle queries for both internal and external domains.


Pingback: Setting Up Active Directory Domain Services (AD DS) - Lazar's World